Agentic RAG using LangChain and Gemini 2.0
In 2023, Retrieval-Augmented Generation (RAG) became one of the most talked-about breakthroughs in AI, transforming how systems handle context and knowledge.
The 2024 was the year of AI Agents, which opened up exciting possibilities for building more autonomous and interactive applications.
If you’re just entering the world of Generative AI and aren’t familiar with RAG, don’t worry—this post will give you the foundational understanding you need and introduce an advanced concept: Agentic RAG.
RAG 101: Fundamentals
LLMs are incredibly powerful, but they come with a limitation: they lack memory. Think of them as giant generators that create responses based solely on their pre-trained knowledge.
While this is sufficient for general responses, what if you need answers tailored to your private or specific datasets? Enters RAG
RAG enables LLMs to retrieve and generate contextually relevant responses by integrating external knowledge bases, such as:
- Vector databases
- Structured knowledge sources
- APIs or other custom tools

Here are a few good resources for you to learn more about RAG
What are AI Agents?
In 2024, following the rise of RAG, AI Agents emerged as a transformative technology. Let’s explore a high-level overview of what AI Agents are and their significance.
AI agents are workflows that combine the reasoning abilities of LLMs with access to memory and external tools such as:
- APIs
- Databases
- Web search engines
These agents plan and execute multi-step workflows, enabling them to complete complex tasks autonomously.
By integrating these workflows with retrieval systems, you create an “Agentic” RAG pipeline that can:
- Access external knowledge sources.
- Decide dynamically when and how to retrieve information.
- Adapt responses based on reasoning and retrieval paths.
Imagine an AI agent that can decide whether to retrieve data from a vector database, perform a web search, or generate a response directly—all based on the user’s query.
Fundamentals of Agentic RAG
Agentic RAG is the fusion of retrieval-augmented generation with agents, improving the retrieval process with decision-making and reasoning capabilities. Here’s how it works:
- Retrieval Becomes Agentic: The agent (Router) uses different retrieval tools, such as vector search or web search, and can decide which tool to invoke based on the context.
- Dynamic Routing: The agent (Router) determines the optimal path. For example:
- If a user query requires private knowledge, it might call a vector database.
- For general queries, it might choose a web search or rely on pre-trained knowledge.
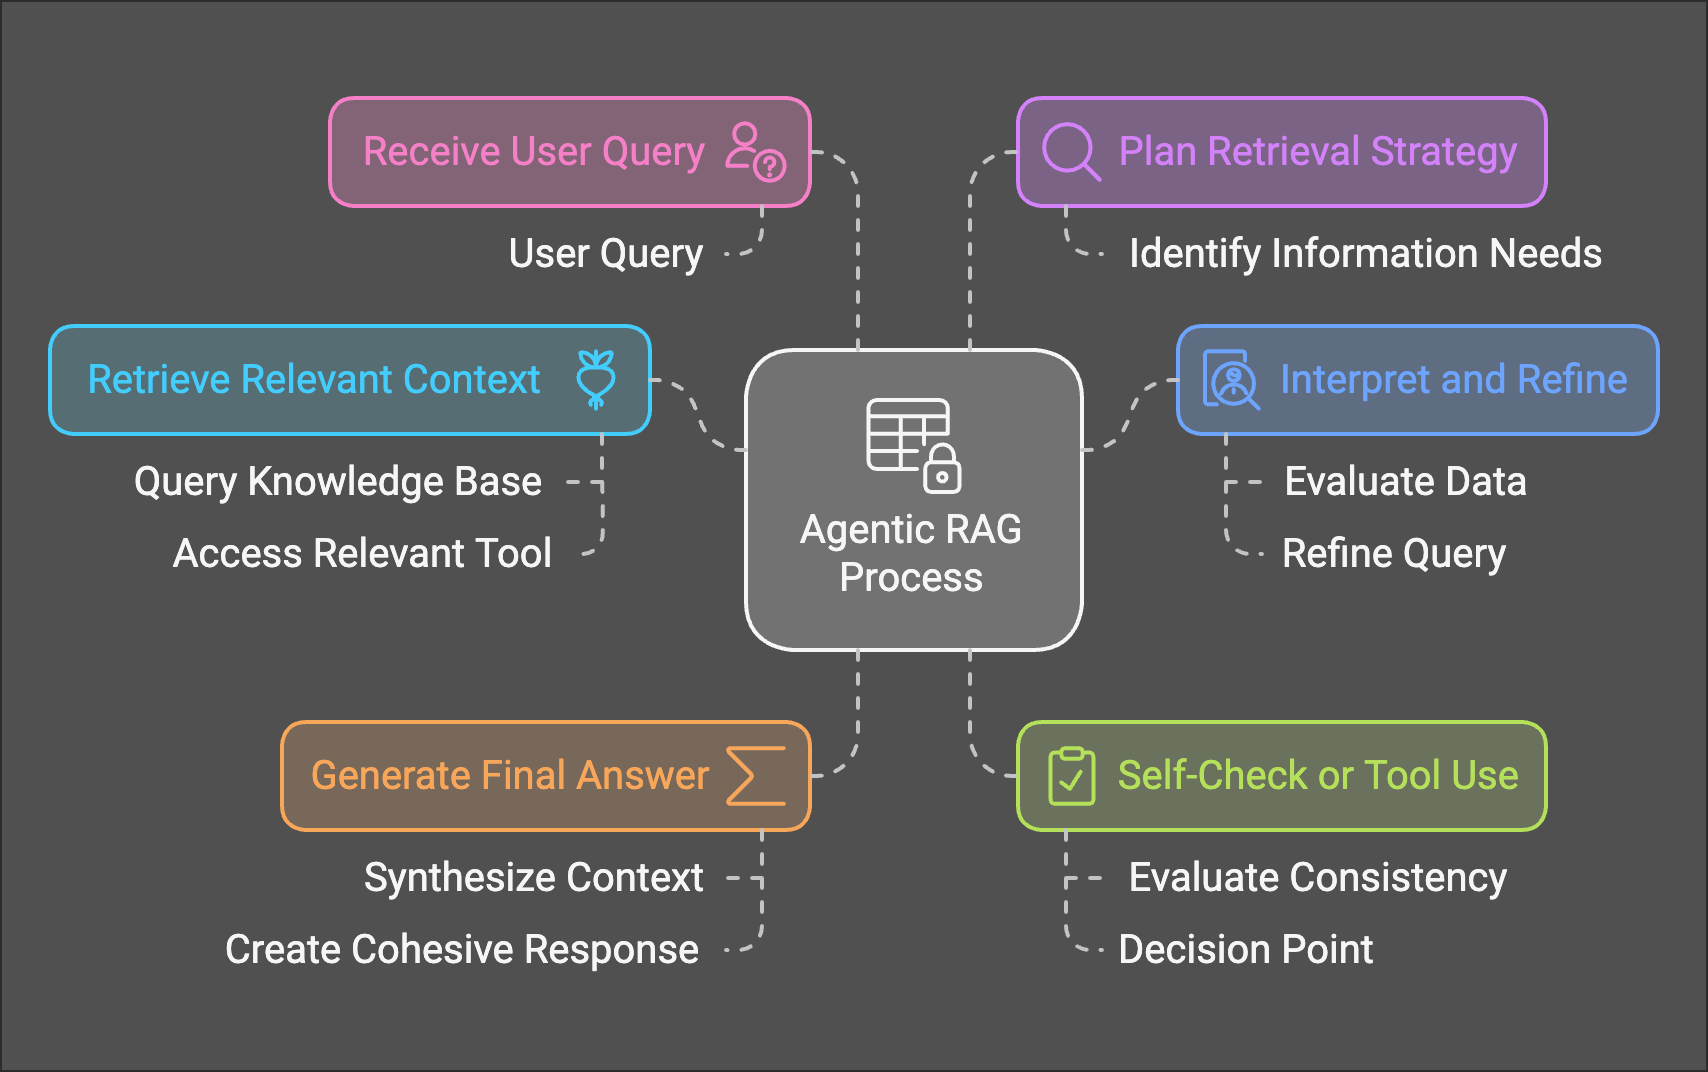
This architecture transforms RAG into a smarter, more adaptable pipeline for building sophisticated AI systems.
Comparison of Traditional RAG vs Agentic RAG
Traditional RAG is a simple one-pass process where you give the system a question, it pulls the most relevant documents from the vector store, and then immediately produces an answer.
This approach can sometimes miss important details or rely too much on whatever documents are fetched during the retrieval process.
Agentic RAG, on the other hand, is an intelligent approach. Instead of just retrieving documents, it uses tools to search for additional information and build the final answer step by step.
This makes it more accurate and flexible.

Implementation: Setting Up Agentic RAG
We’ve published a hands-on Google Colab notebook demonstrating a Basic Agentic RAG pipeline. Below, we’ll walk through the code to help you get started.
1. Installing Libraries and Setting Up Environment
Before diving into the implementation, ensure you have the necessary libraries installed and environment variables configured:
# install dependencies
!pip install --upgrade --quiet athina-client langchain langchain_community langchain-google-genai pypdf faiss-gpu langchain-huggingface
# set api key
import os
from google.colab import userdata
os.environ['ATHINA_API_KEY'] = userdata.get('ATHINA_API_KEY')
os.environ['TAVILY_API_KEY'] = userdata.get('TAVILY_API_KEY')
os.environ["GOOGLE_API_KEY"] = userdata.get('GOOGLE_API_KEY')
2. Loading Documents and Preparing Embeddings
Next, load your documents (e.g., PDFs) and prepare them for retrieval. Split the document into chunks with overlap for better context retrieval.
# load pdf
from langchain_community.document_loaders import PyPDFLoader
loader = PyPDFLoader("/content/tesla_q3.pdf")
documents = loader.load()


# split documents
from langchain.text_splitter import RecursiveCharacterTextSplitter
text_splitter = RecursiveCharacterTextSplitter(chunk_size=500, chunk_overlap=0)
documents = text_splitter.split_documents(documents)


# load embedding model
from langchain_huggingface import HuggingFaceEmbeddings
embeddings = HuggingFaceEmbeddings(model_name="BAAI/bge-small-en-v1.5", encode_kwargs = {"normalize_embeddings": True})
3. Creating a Vector Store with FAISS
Now, create a vector store to store document embeddings for efficient similarity search.
# # create vectorstore
from langchain.vectorstores import FAISS
vectorstore = FAISS.from_documents(documents, embeddings)


# # saving the vectorstore
# vectorstore.save_local("vectorstore.db")
4. Setting Up the Retrievers
Define retrievers from the vector store
# create retriever
retriever = vectorstore.as_retriever()
5. Web Search
We'll use Tavily for the web search component
# define web search
from langchain_community.tools.tavily_search import TavilySearchResults
web_search_tool = TavilySearchResults(k=10)
6. Setting up LLM
# load llm
from langchain_google_genai import ChatGoogleGenerativeAI
llm = ChatGoogleGenerativeAI(model="gemini-2.0-flash-exp")
7. Create Functions for tools
# define vector search
from langchain.chains import RetrievalQA
def vector_search(query: str):
    qa_chain = RetrievalQA.from_chain_type(llm=llm, retriever=retriever)
    return qa_chain.run(query)

# define web search
def web_search(query: str):
   return web_search_tool.run(query)
8. Creating and Defining tools for our Agent
Configure tools the agent can use, such as the vector retriever and web search:
# create tool call for vector search and web search
from langchain.tools import tool

@tool
def vector_search_tool(query: str) -> str:
    """Tool for searching the vector store."""
    return vector_search(query)

@tool
def web_search_tool_func(query: str) -> str:
    """Tool for performing web search."""
    return web_search(query)
# define tools for the agent
from langchain.agents import Tool
tools = [
Tool(
name="VectorStoreSearch",
func=vector_search_tool,
description="Use this to search the vector store for information."
),
Tool(
name="WebSearch",
func=web_search_tool_func,
description="Use this to perform a web search for information."
),
]
9. Creating a Prompt for the Agent
Define a system prompt for the agent to follow during execution:
# define system prompt

system_prompt = """Respond to the human as helpfully and accurately as possible. You have access to the following tools: {tools}
Always try the \"VectorStoreSearch\" tool first. Only use \"WebSearch\" if the vector store does not contain the required information.
Use a json blob to specify a tool by providing an action key (tool name) and an action_input key (tool input).
Valid "action" values: "Final Answer" or {tool_names}
Provide only ONE action per
JSON_BLOB
```
Observation: action result
... (repeat Thought/Action/Observation N times)
Thought: I know what to respond
Action:
```
{{
  "action": "Final Answer",
  "action_input": "Final response to human"
}}
Begin! Reminder to ALWAYS respond with a valid json blob of a single action.
Respond directly if appropriate. Format is Action:```$JSON_BLOB```then Observation"""
# human prompt
human_prompt = """{input}
{agent_scratchpad}
(reminder to always respond in a JSON blob)"""
# create prompt template
from langchain_core.prompts import ChatPromptTemplate, MessagesPlaceholder
prompt = ChatPromptTemplate.from_messages(
[
("system", system_prompt),
("human", human_prompt),
]
)# tool render
from langchain.tools.render import render_text_description_and_args
prompt = prompt.partial(
tools=render_text_description_and_args(list(tools)),
tool_names=", ".join([t.name for t in tools]),
)
10. Building the RAG Chain and Agent
Bring everything together by creating the RAG pipeline and the agent:
# create rag chain
from langchain.schema.runnable import RunnablePassthrough
from langchain.agents.output_parsers import JSONAgentOutputParser
from langchain.agents.format_scratchpad import format_log_to_str
chain = (
    RunnablePassthrough.assign(
        agent_scratchpad=lambda x: format_log_to_str(x["intermediate_steps"]),
    )
    | prompt
    | llm
    | JSONAgentOutputParser()
)
# create agent
from langchain.agents import AgentExecutor
agent_executor = AgentExecutor(
agent=chain,
tools=tools,
handle_parsing_errors=True,
verbose=True
)11. Invoking the Agent
Finally, pass user queries to the agent and watch the Agentic RAG in action:
Query:
agent_executor.invoke({"input": "Total automotive revenues Q3-2024"})Response:
> Entering new AgentExecutor chain...
Thought: I need to find the total automotive revenues for Q3 2024. I should first check my vector store for this information.
Action:
```
{
  "action": "VectorStoreSearch",
  "action_input": "Total automotive revenues Q3-2024"
}
```
Total automotive revenues in Q3-2024 were $20,016 million.
Action:
```
{
  "action": "Final Answer",
  "action_input": "Total automotive revenues in Q3-2024 were $20,016 million."
}
```


> Finished chain.
{'input': 'Total automotive revenues Q3-2024',
 'output': 'Total automotive revenues in Q3-2024 were $20,016 million.'}
12. Execute Multiple Queries
You can also handle batch queries by providing an array of questions:
# create agent with verbose=False for production
agent_output = AgentExecutor(
    agent=chain,
    tools=tools,
    handle_parsing_errors=True,
    verbose=False
)
# Create dataset
question = [
"What milestones did the Shanghai factory achieve in Q3 2024?",
"Tesla stock market summary for 2024?"
]
response = []
contexts = []
# Inference
for query in question:
vector_contexts = retriever.get_relevant_documents(query)
if vector_contexts:
context_texts = [doc.page_content for doc in vector_contexts]
contexts.append(context_texts)
else:
print(f"[DEBUG] No relevant information in vector store for query: {query}. Falling back to web search.")
web_results = web_search_tool.run(query)
contexts.append([web_results])
# Get the agent response
result = agent_output.invoke({"input": query})
response.append(result['output'])# To dict
data = {
"query": question,
"response": response,
"context": contexts,
}Connecting to Athina IDE
Here we are connecting data to Athina IDE to evaluate the performance of our Agentic RAG pipeline.
# Format the data for Athina
rows = []
for i in range(len(data["query"])):
    row = {
        'query': data["query"][i],
        'context': data["context"][i],
        'response': data["response"][i],
    }
    rows.append(row)
In the Datasets section on Athina IDE, you will find the Create Dataset option in the top right corner. Click on it and select Login via API or SDK to get the dataset_id and Athina API key.
#connect to Athina
from athina_client.datasets import Dataset
from athina_client.keys import AthinaApiKey

AthinaApiKey.set_key(os.environ['ATHINA_API_KEY'])

try:
    Dataset.add_rows(
        dataset_id='10a24e8f-3136-4ed0-89cc-a35908897a46',
        rows=rows
    )
except Exception as e:
    print(f"Failed to add rows: {e}")
After connecting the data using the Athina SDK, you can access your data at https://app.athina.ai/develop/ {{your_data_id}}
This will look something like Image-1. Also, you can run various evaluations to test the performance of our Agentic RAG in the "Evaluate" section located in the top right corner. Out for Evaluation will look something like Image-2
Image1

Image2


